Monday, February 28, 2011

These Are My Happy Thoughts...

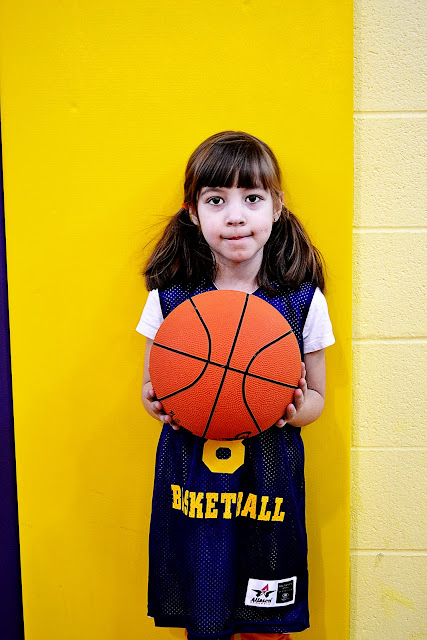
Almost 3 months old....
Moira is the light of my life and the joy of our family!

AJ has the strongest personality of them all...
her emotions are all over her face!

Ah Gabby.... so serious and sensitive,
our eldest is a mystery to me and a constant source of humor!
These girls are my life and indeed my happy thoughts...
never do I take having them for granted.
Each is so different from her sisters,
yet, no one can mistake that they are siblings!
Growing up so fast...
I am the luckiest.
siggy Smaller

Sunday, February 27, 2011

My Cuddly Pot O' Gold!


This was really a fun project!
The girls love their new scarves as did the birthday girl,
who got a pot of chocolate coins.
I can't wait for St. Patricks day now for them to wear their rainbows!

siggy Smaller

Friday, February 25, 2011

La La Love!!

Wow, what a crazy week! So much to see and make.... I have all the pieces cut out for three pretty rainbow scarves so that will get sewed up today. Also, I am working on making my very own t-shirt rag rug from thrifted tees I bought for a song from the Salvation Army. Already I have three HUGE balls of tee shirts cut and rolled, one more to go. I can't wait to get braiding and such! But, here are some more cool projects that I have seen lately:


How cool are these, right?! I hardly have a green thumb, 
but creating these planters just might get me to actually try to keep my plants alive!
There isn't a tutorial and the actual site is in Russian,
but you can get the idea from here and sort of do your own version!


I love making my own playdough with the kids,
but getting boys to craft sometimes is challenging.
What boy wouldn't want to make his own Lego men though? 
Get the how-to here!


If you visit here often, you know that we are a pretty crafty house.
But sometimes even I run out of ideas for the kids to do...
or they want to do something on their own to surprise me.
This Action Pack is a downloadable PDF for only $5, filled with crafts, food, and fun!
It will be available for download on March 1st HERE!


Last year we did a lovely stack of Rainbow pancakes,
this year I am thinking these rainbow cupcakes might just do the trick!
Find this recipe and others from Family Circle here... 
soo many yummy things to eat!


Subway art is all the rage right now,
get your own St. Patrick's Day art here!

Well, there ya go! There are so many cool resources out there for projects,
it is hard to decide which ones to get done first!
Have a great weekend,
and for all my fellow Cleveland folks- stay warm and safe!

siggy Smaller

Thursday, February 24, 2011

Pot O'Gold Rainbow Scarf


Isn't this Rainbow Scarf darling?
Who knew some fleece and quick stitching could be so much fun?! 
It is a really simple and fun tutorial that would thrill even the littlest leprechaun,
and best of all-
the pot at the end of the rainbow is a pocket!!!!

Skip on over to Childmade Tuorials for the how-to here!

siggy Smaller

Wednesday, February 23, 2011

:Wordless Wednesday:


...today we went to the Science Museum....
it was a blast!

siggy Smaller

Tuesday, February 22, 2011

Adorable Messenger Bag Tutorial


This year, instead of buying Easter baskets that will just take up space, break quickly, or get tossed quicker than I can eat all the chocolate, I am planning on making a cute messenger bag of some sort to put the goodies in. This way each of the girls has a cute bag to carry around this summer when we go nature picking or out and about. However, I have yet to see a tutorial that doesn't use fusible fabric lining... until now! This easy tutorial doesn't involve zippers, lining, or crazy supplies... instead it is a simple design that you can use to show off awesome fabric- perhaps some cute Japanese fabric from here? I can't wait to get started on these bags... I have lots of ideas already!

Here is the whole tutorial, originally found here!

What you will need:

  • 1/2 yard medium to heavy weight fabric for outer bag and handles. 
  • 1/2 yard medium to heavy weight fabric for lining.
  • 8" of 1/2" wide elastic.
  • Maxi piping.  (approximately 28").
  • Bolt Snap or any purse snap of choice.
  • D ring (any size of choice)
  • 2 sheets 8.5" X11" printer paper

Step 1:  Create your pattern.

To make your pattern you will take 1 sheet of 8.5" by 11"  printer paper and fold it in-half long ways then cut off the raw edge corner at a curve.  You can trace the bottom of a bowl if you need help making a curve.  This will be the top flap of the bag.


Next fold the straight edge of the flap over 2.5" from the bottom and place the flap with the folded edge tucked under on top of your second 8.5" X 11" printer paper.  Draw a straight line along the curved edge and cut.  This will give you a 2.5" strip pattern piece for the sides and bottom of your bag.  The remaining square will be the pattern for the body of the bag and bag liner.


Step 2:  Cut out fabric for outer body and lining.

Using your prepared pattern cut out fabric. 


Step 3:  

Cut fabric for pocket and strap.

You will need to cut 1 strip of fabric 12" X 5" from your outer fabric for the pocket and 2 strips 2" X 31" for the strap.  1 out of lining fabric and one out of body fabric.


Step 5:  Add piping and sew top flap.

Pin piping to the right side of the outer fabric flap raw edges together.  Sew along piping seam all the way around the top flap leaving the back straight edge without piping.  Pin lining flap and outer flap right sides together and sew around leaving straight edge open.  Flip and iron flat.

Note:  It's best to sew on the top seam created when you attached your piping to the outer fabric.  This will insure that no extra seams will show when the flap is flipped.  


Step 6:  Create and add pocket and embellishments.
Fold over top edge 1/4" and then again 3/4".  Sew along folded edge using 1/8" seam allowance.  This will create the pocket for your elastic.  


Attach a safety pin to the end of elastic and feed it through the pocket.


Make sure you have enough gathering to make a good stretchy pocket then pin to front outer bag wrong side of pocket facing right side of bag.  Sew along 3 outer sides using 1/8" seam allowance.   You may need to trim away some of the elastic depending on how your fabric gathers.


To make tabs and loops you will fold scrap fabric in the length and width of your choice in half, unfold then fold in raw edge sides towards the fold line, fold in half again, then top stitch along both sides for tabs or one side for loops.   


Feed D rings or clasps in the loop and attach loops to top of bag on the right side raw edges aligned.


For tab pockets attach to right side of bag along the left and right side of prepared fabric leaving the top and bottom open to slide things in.  


Step 7:  Prepare outer bag and lining.  You will us 1/2" seam allowance unless stated otherwise.

Pin side panels to front with right sides together and stitch.  Next pin back of bag to one side right sides together and stitch.  Fold right sides together and stitch last side together. 


With the bag inside out finish bottom of bag by pinning one side in place right sides together and sew.  Repeat for remaining 3 sides.  


Make sure you center the bottom panel so you will have the 1/2" seam allowances available on the sides.  


Repeat step 7 for bag lining.

Step 8:  Prepare and attach straps.

With right sides together sew along each long side using 1/4" seam allowance and leaving the top and bottom open.


Attach a safety pin to the outer fabric on one end and feed through the handle turning it right side out.  Iron flat when done.  


Top stitch using 1/8" seam allowance.

Turn the bag right side out and with right sides together attach straps to sides using 1/4" seam allowance.  Reinforce stitch a few time to give it extra strength.  


Step 9:  Add flap.

With right side together pin flap to the back on the bag and stitch using 1/4" seam allowance.  


Step 10:  Attach lining to outer bag.

With the lining of the bag wrong side out and the outer bag right side out place the outer bag inside the lining.  This will put them right sides together.  Tuck the flap and straps inside the lining.  All you should see at this point is the wrong side of the lining.  Stitch around the top using 1/4" seam allowance and leaving a 3" opening along the back side.  Flip right side out and finish by top stitching around the entire top using 1/8" seam allowance.


Congratulations!  You're Finished!


siggy Smaller
Related Posts with Thumbnails