
 Living here in Cleveland you have to learn to either love being outside in all kinds of weather or get really creative with keeping the kids inside. Although Fall and Winter are my favorite seasons, for me I really enjoy being cozy inside while the snow swirls and falls outside of my window. Therefore, I am already thinking about things to keep the little ones entertained while we are inside.
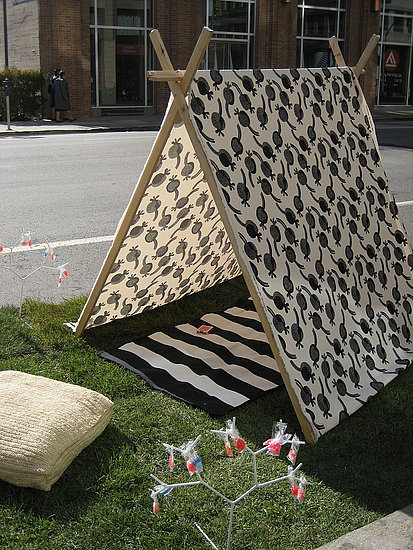
Having such little ones around means that my choices are a little more limited as they are not ready yet for complex crafting. For them playing dress up, playing with cars, and reading are really what they love to do. So over winter break I am planning on making them this wonderful DIY: Pup Tent from Casa Sugar!!
Here are the directions and materials needed: (I can't wait to get started!)
What You'll Need
- Three yards of cotton fabric (upholstery weight is best)
- 20 half-inch finishing screws
- Power drill
- Four two- to three-inch wood screws
- Four six-feet-long boards, anywhere between four and six inches wide
- One one-inch square, five-foot-long board
- A friend who can hold the structure as you're building it
- Measure your fabric. If you get three yards of fabric, each wall of your tent should be 54 inches long. Most fabric is around 56 inches wide as well.
- Mark your one-inch-square board so it has some overlap on each end with enough room in between for the width of your fabric. If your board is five feet long, that means you will have about two inches on either end for the board.
- Next, measure each of your six-foot-long boards and mark them at the length of half of the length of your fabric (if you get four yards of fabric, you should mark boards at 52 inches).
- Now, with your long screws, screw two boards so they form an X. (See photo.) Repeat on other two long boards. This will be the top of your structure.
- Now, have your friend hold one end of the two boards, while you hold the other. Place the one-inch-square board between the X in your boards.
- Move the one-inch-square board so the marks you made overlap the X. Now, screw this board into the notch of the X with the last two long screws. Your tent now has the basic structure finished. You can set it on the floor and it will stand up by itself.
- With your friend's help, drape the fabric over the pup tent structure. Make sure that it is even on each side Have your friend hold the fabric very taut. Then, with your short finishing screws and power drill, drill five screws, from top to bottom, into each edge of the fabric along the sides of the boards.
- You're done! Enjoy your pup tent!
- Note: You can increase or decrease the measurements of the tent to suit your needs.

DIY Teepee
Princess Pavilion Tent
No Sew Teepee
Felt Playhouse
Or you can just order one already made from Etsy! (They are really pretty too!)
